


I've been thinking about crochetting these little owls for a long time. And past couple of days at work, I've been working on the pattern for these cheeky little owls.
So, I thought "These are cute and easy for beginners". In my usual style "TADAHH" & here's a little gift for you all.
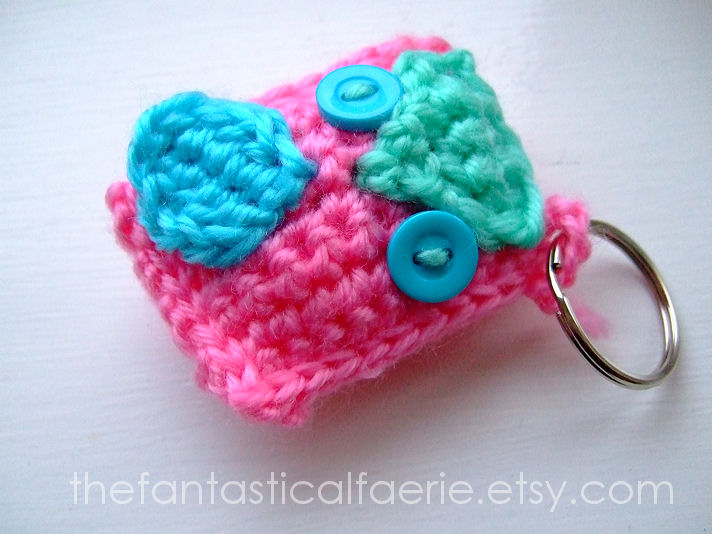
Little Owls;
You will need;
- 3.5mm Crochet hook
- Some oddments of DK yarn
- Couple of buttons
- Either a brooch back or a keyring finding
- Toy stuffing
Just to let you all know, this is written in UK crochet terms. If you want a translation you can mosey on: My Little Crochet Help Guide.
Body (make 2)
Ch 11.
Row 1: From the 2nd ch from the hook, DC across (10 stitches), ch 1, turn work.
Row 2 onwards: Continue until 8 rows have been completed.
Fasten off
Beak
Ch 7
Row 1: From 2nd ch from the hook, DC across, ch 1, turn work. (6 stitches)
Row 2: DC2tog the first 2 stitches together, DC into the next 2 stitches, DC2tog the last 2 stitches, ch1, turn work. (4 stitches)
Row 3: DC2tog the first 2 stitches, DC2tog the last 2 stitches, ch 1, turn work. (2 stitches)
Row 4: DC2tog, fasten off.
Wing
Ch 6.
Row 1: From 2nd ch from hook, DC into 1st stitch, HTR into 2nd, TR into 3rd, HTR into 4th, DC into the last stitch. Ch1.
Don't turn your work to work back on these stitches. You'll be able to see where you crochetted into the original stitches, these will be the stitches we now work into.
Row 2: DC, HTR, TR, HTR, DC, fasten off the work.
Now it's time to sew them together.
- On the front piece sew the wing so it's half off the work.
- Sew the buttons on for the eyes.
- Overlap the beak from the top most edge, over the buttons. Sew into place.
- On the back this is the time to sew the brooch back on.
Take the colour yarn you used for the body, and SC around the edge of your work, pushing your ends in as you crochet.
When you crochet round two sides, and want to make a keyring;
Ch 6, force the little owl through the split ring (poor thing), then carry on SC round.
When you get to the final side, stuff your little owl, and finish off SC. fasten off your work (I always sew the excess yarn into the owl to secure it better).
There you have one little owl!! These are addictive my friends, so crochet with care ;)
I do have a small request: this is an original design, so pretty please don't sell them. I don't mind them being made for charity (because it's what I use all my oddments for). Thank you xx
aww these are so cute!
ReplyDeleteI am very new to Crochet and found this pattern easy to follow. These fellas are so cute I want to make loads !
ReplyDeleteThank you for the feedback hippy kitty!! :D
ReplyDeletewhat can you do for a fatty liver what can you do for a fatty liver what can you do for a fatty liver
ReplyDeleteFeel free to surf to my web page: how to treat fatty liver symptoms